
There’s lots of great resources out there to learn about bioactive rat cage setups. However, as a friend of mine was asking me some questions about starting up a bioactive base, I realised there’s not many complete, written resources out there that guide you through the set up. So, I figured why not write one myself!
Preparing for a bioactive base

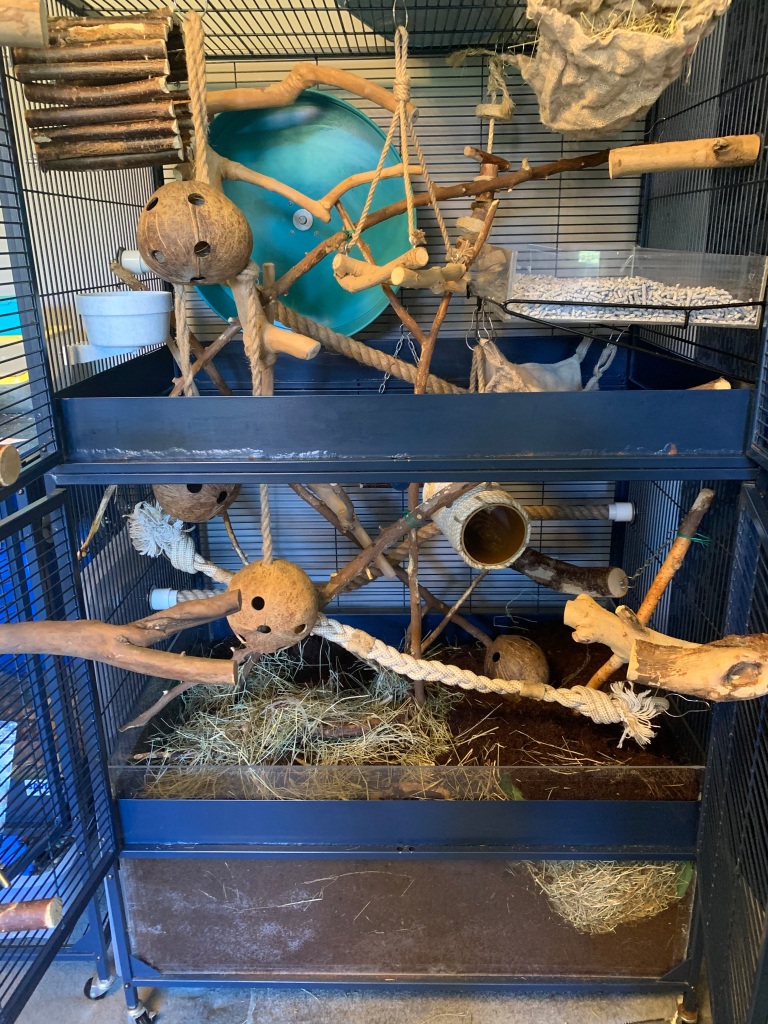
Before you can set up your bioactive base, you need to get ordering/buying everything you need. Firstly, you will need to create some form of base for the soil to go in. Depending on your cage, it may already have a deep base, or you might be required to make a deep base from Perspex. I highly recommend making an extra deep base tray for bioactive soil; while I’m sure it works fine in a shallower base, the deep base is where the rats really get the most enrichment from bioactive soil. My rats spend hours every day making extensive tunnels under the surface, and this would just not be possible without an extended base tray. If you have a large double opening door style cage (e.g., SRS 95), a good choice is to remove the base bars of the cage so that you can add an extra deep base that sits on the storage shelf at the bottom.
I am not going to go through how to create a deep base in this article, as Jemma from Isamu rats has done a much better job in this video. My base tray is 40cm high and is held together with gorilla clear tape which has held up very well. As the filled base is very heavy, I would encourage the cage to be placed on a hard floor to prevent the wheels collapsing (as mine have done as I’ve tried to drag the cage over carpet)
Next, we need soil. To create a bioactive base, you need coco fibre soil. This is often sold in the form of hard bricks which you then add water to. When hydrated, the brick expands rapidly and becomes a nice mulchy soil. To fill my SRS95 extended base to a decent level, I used about 120l of soil (on the bricks it will tell you how many litres each one makes). You can buy the coco fibre from many places online, but I just bought mine from Amazon here. You can also buy it pre-hydrated in bags online too, which saves time making the soil up later- this is personal preference.

Finally, we need the clean-up crew (often abbreviated to CUC). One of the common misconceptions is that for the soil to be bioactive, you need a variety of different bugs and other creepy crawlies. In reality, you actually only need one species, and that species in springtails. The other misconception is that the springtails are going to be big bugs that will get everywhere (my cage is in our carpeted living room so I was definitely worried about finding bugs everywhere). Springtails are actually tiny- no, even tinier than you are imagining. To find them in my base, I have to get up close and stare for a really long time until I notice what looks like a tiny speck of dust moving around, and I can’t even make out legs they’re that small. Springtails also live in soil- they don’t live on living creatures like rats, so your rats aren’t going to be riddled, and they also don’t live in your carpet etc. My rats kick out soil when digging and there’s never been any sign of the springtails outside the cage whatsoever.
Size of springtail below…

Can’t see it? Let me zoom in!

As a note: just because springtails are the only things you need to make your soil bioactive, doesn’t mean you can’t add other creepy crawlies. These will not necessarily help with the bioactive nature of the soil (though will definitely not harm!), they are essentially just for enrichment of the rats; in short they are additional buffet items! I personally have stuck to just springtails, but you can also add isopods, earthworms and probably lots of other things.
People often ask how many springtails to add to the soil and my answer is… some. Not very helpful, but if there’s a precise formula for working out how many are supposed to go in, I haven’t found it. I bought one colony originally, put that in my soil, and felt it wasn’t enough so bought three more. A few months later and I can still find enough of them when I look hard enough that I’m sure they’re thriving. You can buy springtails from a variety of online sources, I went with this website and was very happy.
Setting up a bioactive base
So you’ve got everything ready, it’s time to set up! You’ll need some form of box or large tub to mix your soil in. To do this, place the brick in the bottom then begin adding water. There is a guide of how much water to add on the brick instructions, but I tend to just keep adding, breaking up the bricks, and adding more water until the soil reaches the right consistency. It’s worth remembering to err on the side of caution- you can always add more water if it’s a little dry, but you can’t take it away. If you do end up over-doing it with the water, you can drain off the excess and leave it overnight for the water to evaporate, but this is a pain when you’re super excited to get started!
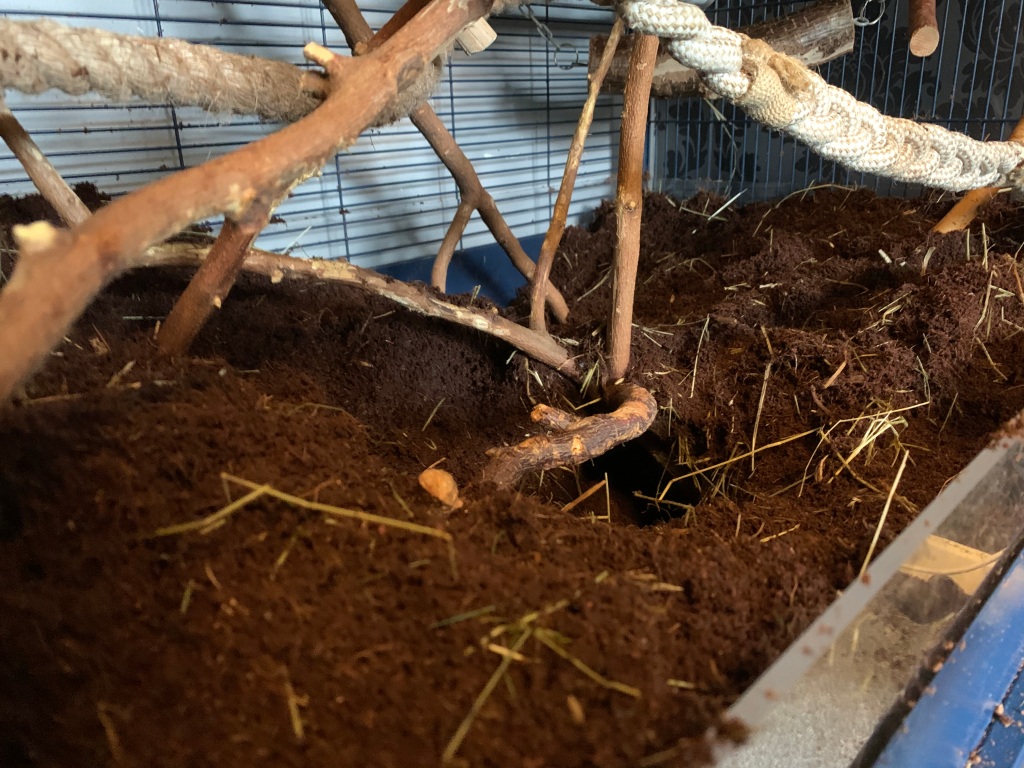
You want your soil to be earthy, but not too damp or too dry. When squeezed in the hand, it should clump together rather than crumble (too dry) or leak water (too wet). Continue mixing your bricks with water and adding that soil to your cage base until it’s about ½ to 2/3 full to the top. I made the mistake of adding the soil until it was about the height of my usual substrate (about ¾ full) and regretted it quite quickly when the rats started creating tunnels and the height of all that dug out space underneath increased the height of the top of the soil and made it fall out the sides.

I added a few extras to the soil to help the likelihood of tunnel creation. I added a variety of branches in the soil to add some structure for them to build around. I also added some dust free hay and barley straw (from here) mixed through the soil to give the soil itself more structure so it is more likely to hold tunnels well. These aren’t necessary, but I find they do help. Finally, the last thing I added was some of the rats’ food mix to the base both as food for the springtails and for the seeds to grow into plants which is more enrichment for the rats. (Note: this only works with a good quality shunamite style mix because these have raw seeds in that will sprout; a nugget or other processed rat food will not work.)
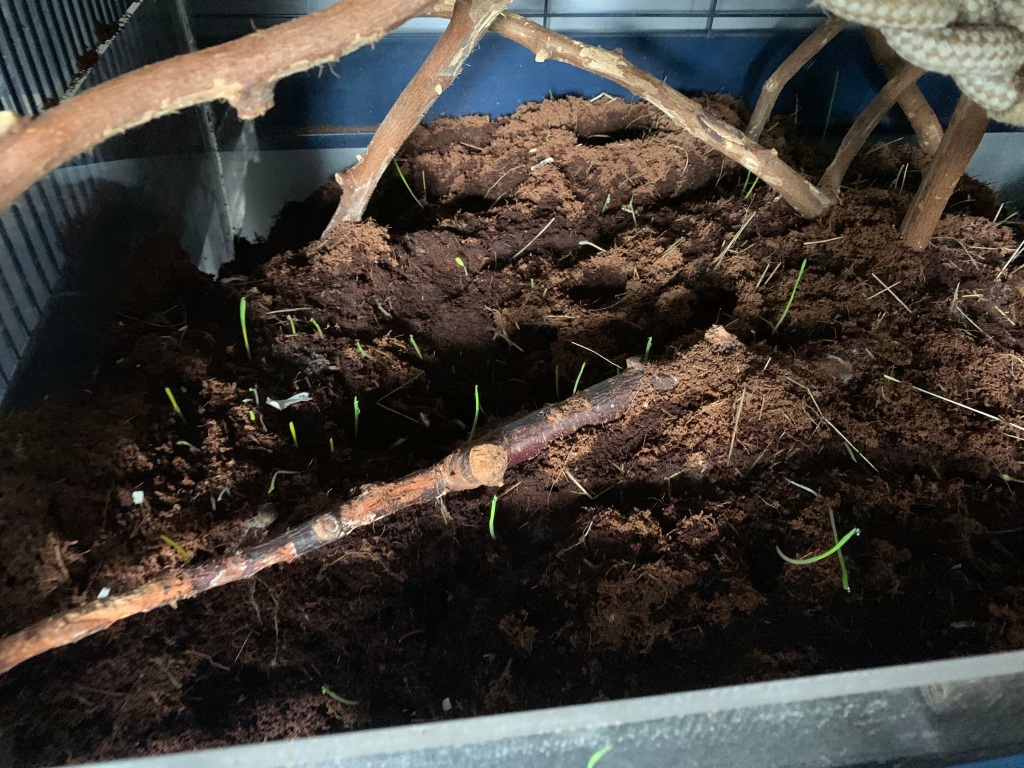
Finally, add your springtails. Again, there doesn’t seem to be anything special in how you are meant to do this; I dug small holes in the soil and put little groups of springtails around the cage. Mine are still alive so I assume this was okay! Ideally, you want to give the springtails a few days to settle into the cage before adding your destructive little rodents, but I think it probably isn’t the end of the world if they don’t get this. I gave mine a few days while the rats were in intros and ended up accidentally farming in the cage!
Maintaining a bioactive base
There are a few major advantages to a bioactive base, the main one to me is that you don’t ever have to change the soil. The springtails take care of the urine and faeces in the soil and turn it back into soil. You do, however, need to turn the soil every now and then. I probably do this about one a month-ish, but my rats regularly create tunnels and turn the soil themselves; I’m sure if my rats weren’t quite as active with digging, I may need to do this more frequently. You also need to add water to the base as the soil can dry out. You want to keep the water at that earthy texture where it clumps and sticks together without being waterlogged or dusty. It’s difficult to suggest a schedule on which to add water; I think the temperature of the room makes a big difference. I haven’t added water more than once per month, but you should play it by ear with your own soil depending on how dry it feels.
You should still use litter trays in your cage- rats produce too much waste for the springtails to fully take care of, so it’s important to still have litter trays that you change when they start to smell. I keep 13 rats in my extended base SRS 95 and I change their litter tray and hammocks about once every 2 weeks.
In terms of springtails, there’s nothing special you need to do to keep them alive except from keeping the soil moist (they breed in droplets of water apparently) and keep letting the rats do their business in the soil. Apparently, you can buy special springtail food, but I haven’t tried this and mine seem to be doing well as is. I have heard others say they have topped up their springtail colony when they couldn’t see any, so it’s worth keeping an eye on how they’re doing. Some enthusiastic owners have also started their own CUC breeding tanks so that they have an endless supply of springtails and other bugs to add in.
I’ve found that in terms of the amount of cleaning required outside of the cage, my rats do kick out a lot of soil when they’re digging (totally worth it to see the amazing tunnels they create), but they used to kick out substrate when I had that too. The difference is that substrate was very annoying because it got everywhere (stuck to clothes and furniture) and got stuck in the hoover. The soil on the other hand, dries out very quickly and turns to dust which is then swept up easily or hoovered up without killing the hoover. I tend to sweep up the majority and put it back into the cage then hoover up the rest. Overall, I’ve found that my bioactive base smells significantly better than wood shavings ever did (at least after a few weeks of use), is much easier to clean up, doesn’t clog up the hoover or get distributed throughout my house, and is a huge source of wonderful enrichment for my rats.


Update: I was advised that springtails were not sufficient for making soil bioactive and that I should add bio-boost to my soil to improve the bacteria and bioactive-ness of the soil. After adding this and monitoring for a few months, I can’t see any changes to the springtails, the soil, the smell etc. If you want to add this, go for it, but in my experience it didn’t add any benefits.
All the articles on my website have always been and will always be free, created by me because I am passionate about rat care. However, if you have found my articles useful you might also love my book!

